
Next.jsをcreate-next-appした素の状態で使おうとしていませんか?ちょっと待ってください!
後々のことを考えると、最初に諸々の設定をした方がよく、その設定が結構厄介なため、手順をまとめることにしました。
以下の環境を構築します。versionも合わせて記載しております。
- Next.js @12.3.1
- TypeScript @4.8.3
- tailwindCSS @3.1.8
Next.js TypeScript の初期設定
Next.jsプロジェクト作成
ディレクトリを作成し、プロジェクトを立ち上げます。
ここではプロジェクト名を「nextjs-ts-tailwind」とします。「–ts」オプションを付けることでTypeScriptになります。
% mkdir nextjs-ts-tailwind

% cd nextjs-ts-tailwind

% npx create-next-app --ts .
プロジェクトができたら、アプリを立ち上げます。
% npm run devディレクトリ構成初期設定 srcディレクトリ作成
この時点で、デフォルトのディレクトリ構成は以下のようになっています。

これを、いろいろ設定し、最終的には以下の構成としていきます。
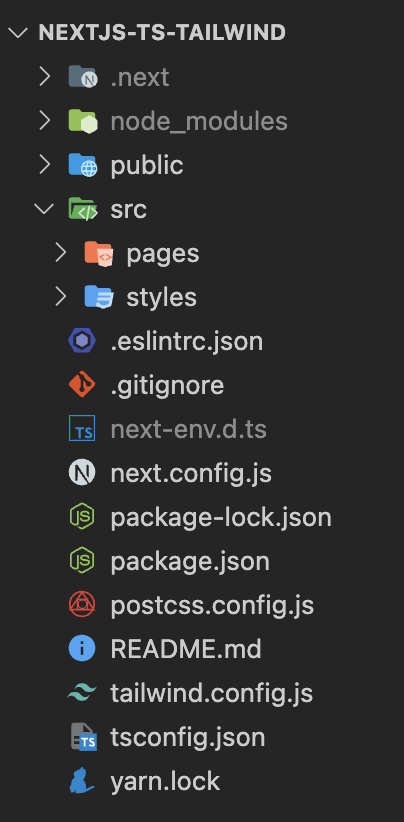
pagesやstylesディレクトリがプロジェクトルートにあるのはイケてないので、srcディレクトリを作成して、その中に入れるようにします。
なぜイケていないかは後々わかると思います。
ディレクトリの変更は以下の手順で進めます。
- プロジェクトルートにsrcディレクトリを作成
- srcディレクトリ内にpagesとstylesディレクトリを入れる
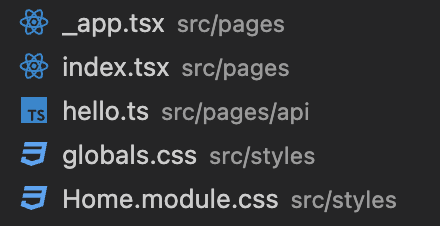
このときに、pagesとstylesディレクトリ内の以下5つのファイルに変更が加わったかのように見えますが、実際は変更はないので問題ありません。
tsconfig.jsonの変更
tsconfig.jsonは、TypeScriptのコンパイルの設定をしているファイルで、上記でsrcを追加したことによりディレクトリ構成が変わったので記述を変更する必要があります。
デフォルトでは以下の記述内容となっています。
{
  "compilerOptions": {
    "target": "es5",
    "lib": ["dom", "dom.iterable", "esnext"],
    "allowJs": true,
    "skipLibCheck": true,
    "strict": true,
    "forceConsistentCasingInFileNames": true,
    "noEmit": true,
    "esModuleInterop": true,
    "module": "esnext",
    "moduleResolution": "node",
    "resolveJsonModule": true,
    "isolatedModules": true,
    "jsx": "preserve",
    "incremental": true
  },
  "include": ["next-env.d.ts", "**/*.ts", "**/*.tsx"],
  "exclude": ["node_modules"]
}
ここに以下の設定を行います。
- baseUrlをsrcに設定する。
- includeにsrcを追記し、コンパイル対象となるようにする。
変更箇所は以下のハイライト部です。
{
  "compilerOptions": {
    "target": "es5",
    "lib": ["dom", "dom.iterable", "esnext"],
    "allowJs": true,
    "skipLibCheck": true,
    "strict": true,
    "forceConsistentCasingInFileNames": true,
    "noEmit": true,
    "esModuleInterop": true,
    "module": "esnext",
    "moduleResolution": "node",
    "resolveJsonModule": true,
    "isolatedModules": true,
    "jsx": "preserve",
    "incremental": true,
    "baseUrl": "src"
  },
  "include": ["next-env.d.ts", "src/**/*.ts", "src/**/*.tsx"],
  "exclude": ["node_modules"]
}
追記した2点についてもう少し詳しく説明します。
baseUrlオプション
importを相対パスでなく絶対パスで記述できるようになります。
baseUrlオプションにsrcを指定することで、component等をimportするときにsrcディレクトリを基点とすることができます。
具体例として、、
_app.tsxファイルのglobals.cssのimportを以下のように変更できます。
baseUrl設定前
import '../styles/globals.css'

baseUrlをsrcに設定誤
import 'styles/globals.css'
今いるファイルから..で上の階層に上がって、、とかはしなくても良いということです!

includeオプション
includeオプションでは、プログラムに含めるファイル名またはパターンのリストを指定しています。
srcディレクトリはtsconfig.jsonと同階層にあり、src/を追記しないとプロジェクト全体が対象となってしまうため追記します。

tailwindCSSの設定
tailwindのインストールは以下の公式ドキュメントを見ながらやっていきます。

% npm install -D tailwindcss postcss autoprefixer
% npx tailwindcss init -p
yarnの場合
% yarn add -D tailwindcss postcss autoprefixer
% yarn tailwindcss init -p
tailwind.config.jsのcontentに追記しますが、ここがドキュメントと異なります。
/** @type {import('tailwindcss').Config} */
module.exports = {
  content: [
    "./pages/**/*.{js,ts,jsx,tsx}",
    "./components/**/*.{js,ts,jsx,tsx}",
  ],
  theme: {
    extend: {},
  },
  plugins: [],
}
以下のようにsrcを追記する必要があります。
/** @type {import('tailwindcss').Config} */
module.exports = {
  content: [
    "./src/pages/**/*.{js,ts,jsx,tsx}",
    "./src/components/**/*.{js,ts,jsx,tsx}",
  ],
  theme: {
    extend: {},
  },
  plugins: [],
};
cssファイルはドキュメントと同じです。
html,
body {
  padding: 0;
  margin: 0;
  font-family: -apple-system, BlinkMacSystemFont, Segoe UI, Roboto, Oxygen,
    Ubuntu, Cantarell, Fira Sans, Droid Sans, Helvetica Neue, sans-serif;
}

a {
  color: inherit;
  text-decoration: none;
}

* {
  box-sizing: border-box;
}

@media (prefers-color-scheme: dark) {
  html {
    color-scheme: dark;
  }
  body {
    color: white;
    background: black;
  }
}

@tailwind base;
@tailwind components;
@tailwind utilities;
最後に、index.tsxのmain要素内をtailwindを使ったHello world!にしましょう。
import type { NextPage } from "next";
import Head from "next/head";
import Image from "next/image";
import styles from "styles/Home.module.css";

const Home: NextPage = () => {
  return (
    <div className={styles.container}>
      <Head>
        <title>Create Next App</title>
        <meta name="description" content="Generated by create next app" />
        <link rel="icon" href="/favicon.ico" />
      </Head>

      <main className={styles.main}>
        <h1 className="text-3xl font-bold underline">Hello world!</h1>
      </main>

      <footer className={styles.footer}>
        <a
          href="https://vercel.com?utm_source=create-next-app&utm_medium=default-template&utm_campaign=create-next-app"
          target="_blank"
          rel="noopener noreferrer"
        >
          Powered by{" "}
          <span className={styles.logo}>
            <Image src="/vercel.svg" alt="Vercel Logo" width={72} height={16} />
          </span>
        </a>
      </footer>
    </div>
  );
};

export default Home;
以下のように、太文字で、underlineが付いていればtailwindCSSが適用されています!

+αの設定
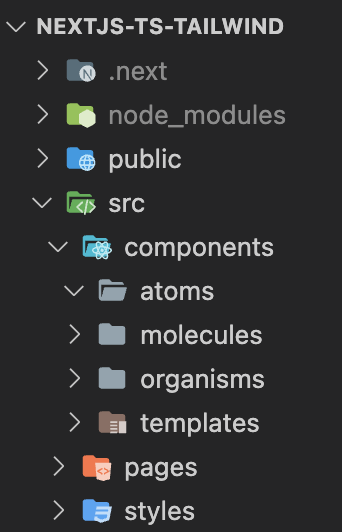
これは好みですが、この初期設定の時点でcomponentsのディレクトリと、Atomicデザインのディレクトリを作っておきましょう!
こんな感じです。
Atomicデザインについてはこちらに詳しくまとめていますのでご覧ください。

以上、お読みいただきありがとうございました。
コメント