Amplifyで認証機能を作成したものの、変更が必要になった。そのような場合の、編集方法をまとめました。
目標物
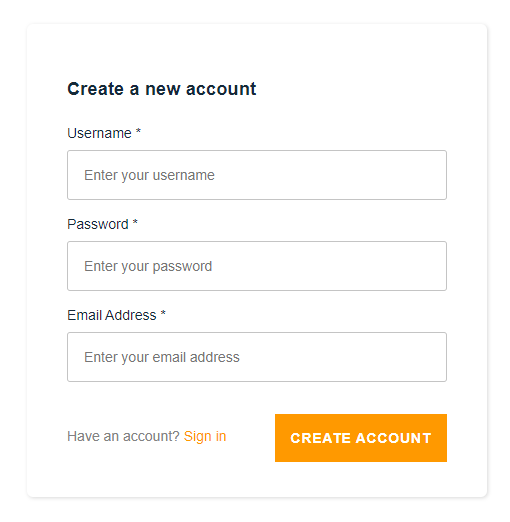
以下に示すのSign up(認証)機能を作ります。

3つの項目を入力し、CREATE ACCOUNT

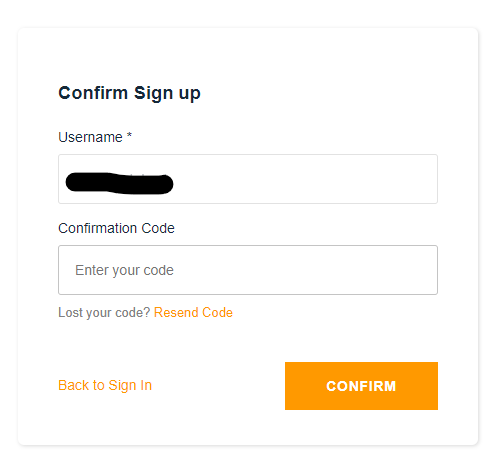
登録したメールアドレス宛に確認コードが送られてくるため、コードを入力し、CONFIRM

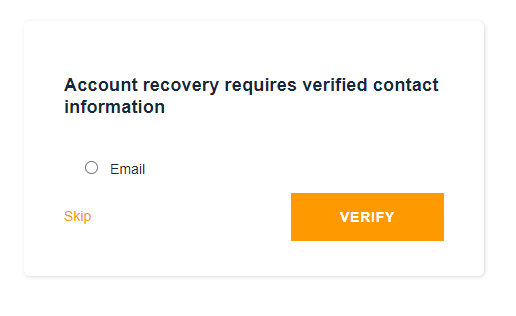
アカウント復旧用にEmailアドレスを登録してもらう。
これでSign up完了!
認証方法設定
まずはupdateの以下コマンドを実行します。
$ amplify update auth
Please note that certain attributes may not be overwritten if you choose to use defaults settings.
Using service: Cognito, provided by: awscloudformation
 What do you want to do? (Use arrow keys)
> Apply default configuration with Social Provider (Federation)
  Walkthrough all the auth configurations
  Create or update Cognito user pool groups
  Create or update Admin queries API
細かい設定をしたいので「Walkthrough all the auth configurations」を選択します。
 Select the authentication/authorization services that you want to use: (Use arrow keys)
> User Sign-Up, Sign-In, connected with AWS IAM controls (Enables per-user Storage features for images or other content, Analytics, and more)
  User Sign-Up & Sign-In only (Best used with a cloud API only)
  I want to learn more.
Sign-Up & Sign-In onlyで作成します。
 Do you want to add User Pool Groups? (Use arrow keys)
> Yes
  No
  I want to learn more.
User Poolとは、Amazon Cognito のユーザーディレクトリのことであり、User Poolを使用すると、ユーザーは Amazon Cognito 経由でウェブまたはモバイルアプリにログインできるようになります。
Amazon Cognito とは
アプリの認証、承認、およびユーザー管理機能を提供する。
主な 2 つのコンポーネント(システムを構成する要素のこと)には、ユーザープールと ID プールがある。
ユーザープール :アプリユーザーのサインアップとサインインオプションを提供するユーザーディレクトリ
ID プール :AWS の他のサービスに対するアクセスをユーザーに許可する
以上より、「Yes」を選択
? Provide a name for your user pool group: userユーザーはuserだから、「user」と名前をつけることに。
? Do you want to add another User Pool Group (y/N) User Poolはひとまず1つで良いのでN
? Sort the user pool groups in order of preference ...  (Use <shift>+<right/left> to change the order)
  user
sortするといってもuserしかないのでEnter
 Do you want to add an admin queries API? (Use arrow keys)
> Yes
  No
  I want to learn more.
admin queries APIを入れることとします。
これを入れると、複数のユーザグループとユーザ作成を画面上で操作できるようになる。
? Do you want to restrict access to the admin queries API to a specific Group (Y/n) ? Select the group to restrict access with: (Use arrow keys)
> user
Enter a custom group Multifactor authentication (MFA) user login options: OPTIONAL (Individual users can use MFA) For user login, select the MFA types: (Press <space> to select, <a> to toggle all, <i> to invert selection)
(*) SMS Text Message
>( ) Time-Based One-Time Password (TOTP)サインアップ時に電話番号の登録はしないため、TOTPを選択する。
まとめると、最終的には以下のようになります。
$ amplify update auth
Please note that certain attributes may not be overwritten if you choose to use defaults settings.
Using service: Cognito, provided by: awscloudformation
 What do you want to do? Walkthrough all the auth configurations
 Select the authentication/authorization services that you want to use: User Sign-Up & Sign-In only (Best used with a cloud API only)
 Do you want to add User Pool Groups? Yes
? Provide a name for your user pool group: user
? Do you want to add another User Pool Group No
√ Sort the user pool groups in order of preference · user
 Do you want to add an admin queries API? Yes
? Do you want to restrict access to the admin queries API to a specific Group Yes
? Select the group to restrict access with: user
 Multifactor authentication (MFA) user login options: OPTIONAL (Individual users can use MFA)
 For user login, select the MFA types: Time-Based One-Time Password (TOTP)
 Please specify an SMS authentication message: Your authentication code is {####}
 Email based user registration/forgot password: Enabled (Requires per-user email entry at registration)
 Please specify an email verification subject: Your verification code
 Please specify an email verification message: Your verification code is {####}
 Do you want to override the default password policy for this User Pool? Yes
 Enter the minimum password length for this User Pool: 8
 Specify write attributes:
 Do you want to enable any of the following capabilities?
 Do you want to use an OAuth flow? No
Warning! Your existing IdentityPool: mesurementb302ca3b_identitypool_b302ca3b will be deleted upon the next “amplify push”!
? Do you want to configure Lambda Triggers for Cognito? Yes
? Which triggers do you want to enable for Cognito今回は細かい設定をするために、「Walkthrough all the auth configurations」を選択しました。
「Default configuration」を選択した場合、すごく簡単に認証機能がつくれるので、こんなにも大変だとは思いませんでした。
そして、amplify push
$ amplify push
√ Successfully pulled backend environment dev from the cloud.

    Current Environment: dev

┌──────────┬──────────────────────┬───────────┬───────────────────┐
│ Category │ Resource name        │ Operation │ Provider plugin   │
├──────────┼──────────────────────┼───────────┼───────────────────┤
│ Auth     │ userPoolGroups       │ Create    │ awscloudformation │
├──────────┼──────────────────────┼───────────┼───────────────────┤
│ Function │ AdminQueries7f94cd2c │ Create    │ awscloudformation │
├──────────┼──────────────────────┼───────────┼───────────────────┤
│ Api      │ AdminQueries         │ Create    │ awscloudformation │
├──────────┼──────────────────────┼───────────┼───────────────────┤
│ Auth     │ mesurementb302ca3b   │ Update    │ awscloudformation │
└──────────┴──────────────────────┴───────────┴───────────────────┘
? Are you sure you want to continue? Yes数分待つと、クラウドへの反映が完了
これで、最初の目標物として記載したビューができているはずです。

コメント